 RStudio
Server Interface
RStudio
Server Interface
For Congen 2025 we launch a Linux AWS server that uses RStudio as its interface, reachable through your web browser, at https://handson.congen1.com. The server is intended solely for ConGen instructors and students, and only for use related to the hands-on exercises and materials. During the workshop, it is available continually, both during the hands-on sessions themselves and otherwise for practice or other activity related to the exercises. You should have been sent a user name and a password. Connecting to the RStudio Server allows you to login to the server, run R, execute programs in the Linux environment from a bash terminal, create and edit text files, and to copy files between your local computer and the AWS server.
To enable you to connect to the ConGen server, navigate to https://handson.congen1.com in your web browser to reach the RStudio interface.
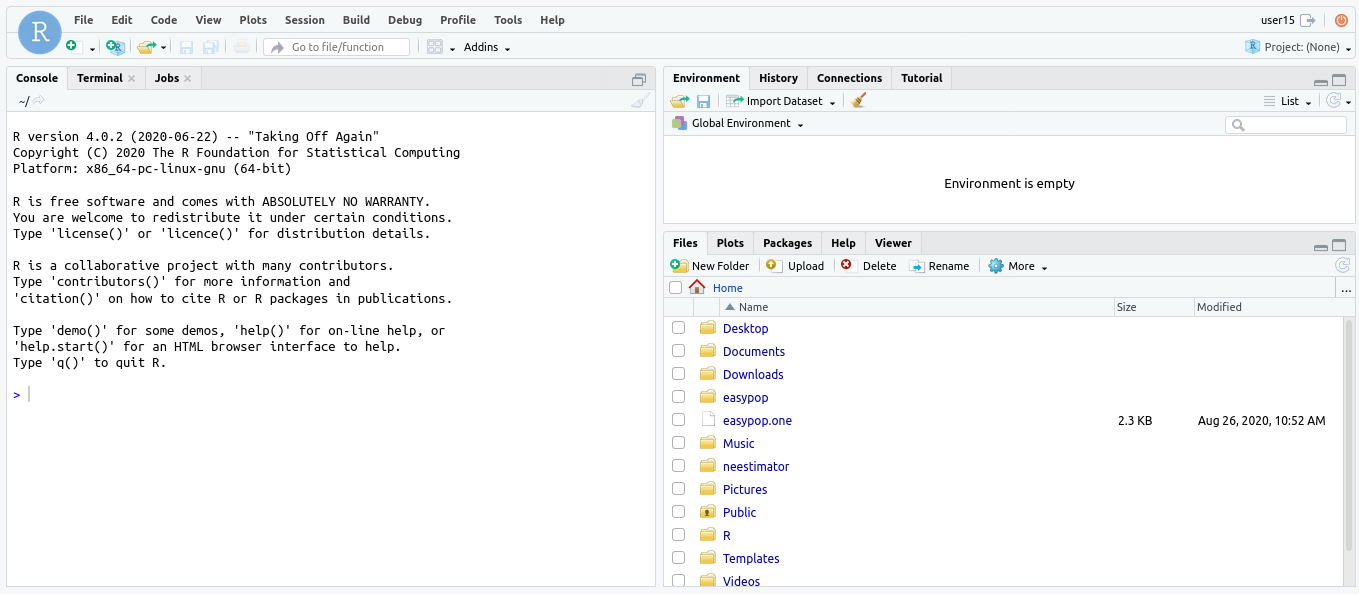
On your first connection to the RStudio Server, please login to change your password to a more secure, personal password. After you link to the URL in your web browser, you should see the RStudio login screen. After logging in with the user name and the password we’ve provided for you, you’ll see the RStudio interface:
RStudio
Server Interface
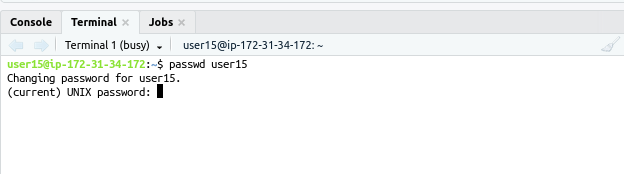
Please click on the “Terminal” tab on the left-hand pane, to use the Linux bash shell, and use the “passwd” command (see image below), and follow the prompts to change the default, less secure password to one of your choice. Please use at least 8 characters, and a mixture of numbers and letters. Mixing upper and lower case letters also increases security. After issuing the “passwd” command followed by your username, you will be prompted to enter the current password (the default password we sent you), and then you’ll be prompted to enter, and then re-enter, your new password.
If you lose or forget your password contact ConGen staff, and we’ll reset it for you.
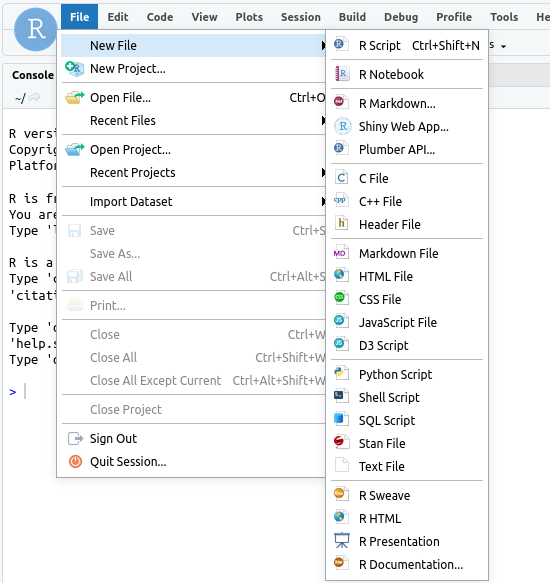
To review Rstudio’s basic features (see the image above, of the RStudio server interface), note that the left pane has tabs for a “Console,” which is the R console, and a window to show plots (lower right pane, “Plots” tab). The left pane’s “Terminal,” tab gives you a standard Linux bash terminal, in which you will execute many of the programs for the ConGen hands-on exercises. In the “Files” tab, by default you’ll see files and folders inside your /home/ directory, one of which is a folder named “instructor_materials.” Clicking on this gives you (read-only) access to the instructor materials, including data needed for hands-on exercises. The interface also has a text file editor that offers customized highlighting and auto-fill for many file types (see image below). You can also load a suitable file into the text editor simply by clicking on a file shown in the list of files/directories in the “Files” pane.
U ploading
Files. The lower right hand pane provides a “Files” tab. To
upload files from your computer to the AWS server, after clicking on
the “Files” tab, click on the "Upload" button in the
row of buttons at the top of the Files pane. You’ll then see a
dialog window with a box labeled "Target directory."
Click browse, and you can select the destination (inside your home
directory only) where you want to put your files on the server, and
click "Choose." Next, click on "Browse" below
the "File to upload", and you should see your own
computer’s directories. You can browse your own directories
and select a file to upload, and click "Open."
ploading
Files. The lower right hand pane provides a “Files” tab. To
upload files from your computer to the AWS server, after clicking on
the “Files” tab, click on the "Upload" button in the
row of buttons at the top of the Files pane. You’ll then see a
dialog window with a box labeled "Target directory."
Click browse, and you can select the destination (inside your home
directory only) where you want to put your files on the server, and
click "Choose." Next, click on "Browse" below
the "File to upload", and you should see your own
computer’s directories. You can browse your own directories
and select a file to upload, and click "Open."
Notes: RStudio allows uploading only one file at a time, but RStudio documentation suggests zipping up multiple files into a single zip archive and uploading it. In this case RStudio automatically unzips the files into the target directory.
Warning: if you want to upload files totaling over 2 GB, please contact ConGen support staff, as we will be managing disk space, and because RStudio reportedly has had an issue in which uploads over several GB can cause it to lock you out of your session.
Downloading Files.
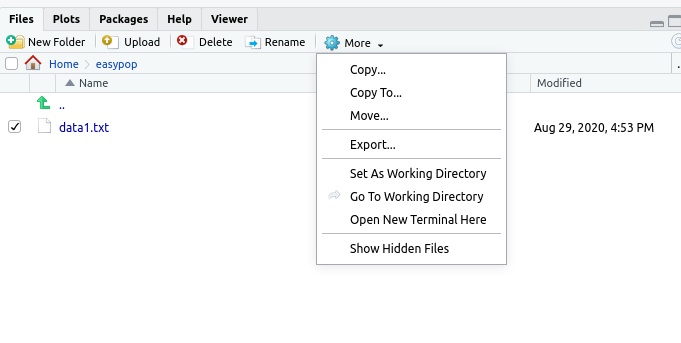
To download files from the AWS server to your own computer, with the “Files” tab selected, first click on the box next to the file or directory you want to download. Next, click on “More,” then “Export” (see image below), and follow your browser’s prompt to download the file or (automatically zipped) directory.